Installation
This guide covers setting up and running the ImLate server.
Prerequisites
| Tool | Version | Notes |
|---|---|---|
| Docker | 20.10+ | With Docker Compose v2 (recommended setup) |
| Go | 1.25+ | Only needed for local (non-Docker) setup |
| Make | any | Thin wrapper around Docker scripts |
| MySQL client | optional | For direct database access |
Option 1: Docker Setup (Recommended)
Docker Compose starts MySQL 8 and the Go application with hot-reload.
1
Clone the repository:
bash
git clone git@github.com:buzyka/imlate.git
cd imlate
2
Create the environment file. Copy the example and set AUTH_TOKEN_SECRET (minimum 32 characters):
bash
cp docker/.env.docker.example .envEdit .env and set a secure value for AUTH_TOKEN_SECRET.
3
Start the environment:
bash
make startThis runs docker compose up, waits for MySQL to be healthy, applies database migrations automatically, and starts the application.
4
Verify the setup:
bash
curl http://localhost:8080/ping
# {"message":"pong"}
Docker Compose Topology
The development environment runs two containers:
| Service | Container | Host Port | Description |
|---|---|---|---|
| app | imlate-app | 8080 | Go application with source mounted |
| mysql | imlate-mysql | 3307 | MySQL 8.0 with persistent data volume |
MySQL creates a tracker database with user trackme/trackme on first start.
Option 2: Local Setup (Without Docker)
Requires a running MySQL 8 instance with a tracker database.
1
Set environment variables (or create a .env file in the project root):
bash
export DATABASE_HOST=127.0.0.1
export DATABASE_PORT=3306
export DATABASE_USERNAME=trackme
export DATABASE_PASSWORD=trackme
export DATABASE_NAME=tracker
export AUTH_TOKEN_SECRET="your-secret-at-least-32-characters-long"
2
Install dependencies and run:
bash
go mod download
go run cmd/app/main.go
Migrations are applied automatically on startup.
Verification
Once the application is running on port 8080:
| URL | Description |
|---|---|
http://localhost:8080/ping | Health check — returns {"message":"pong"} |
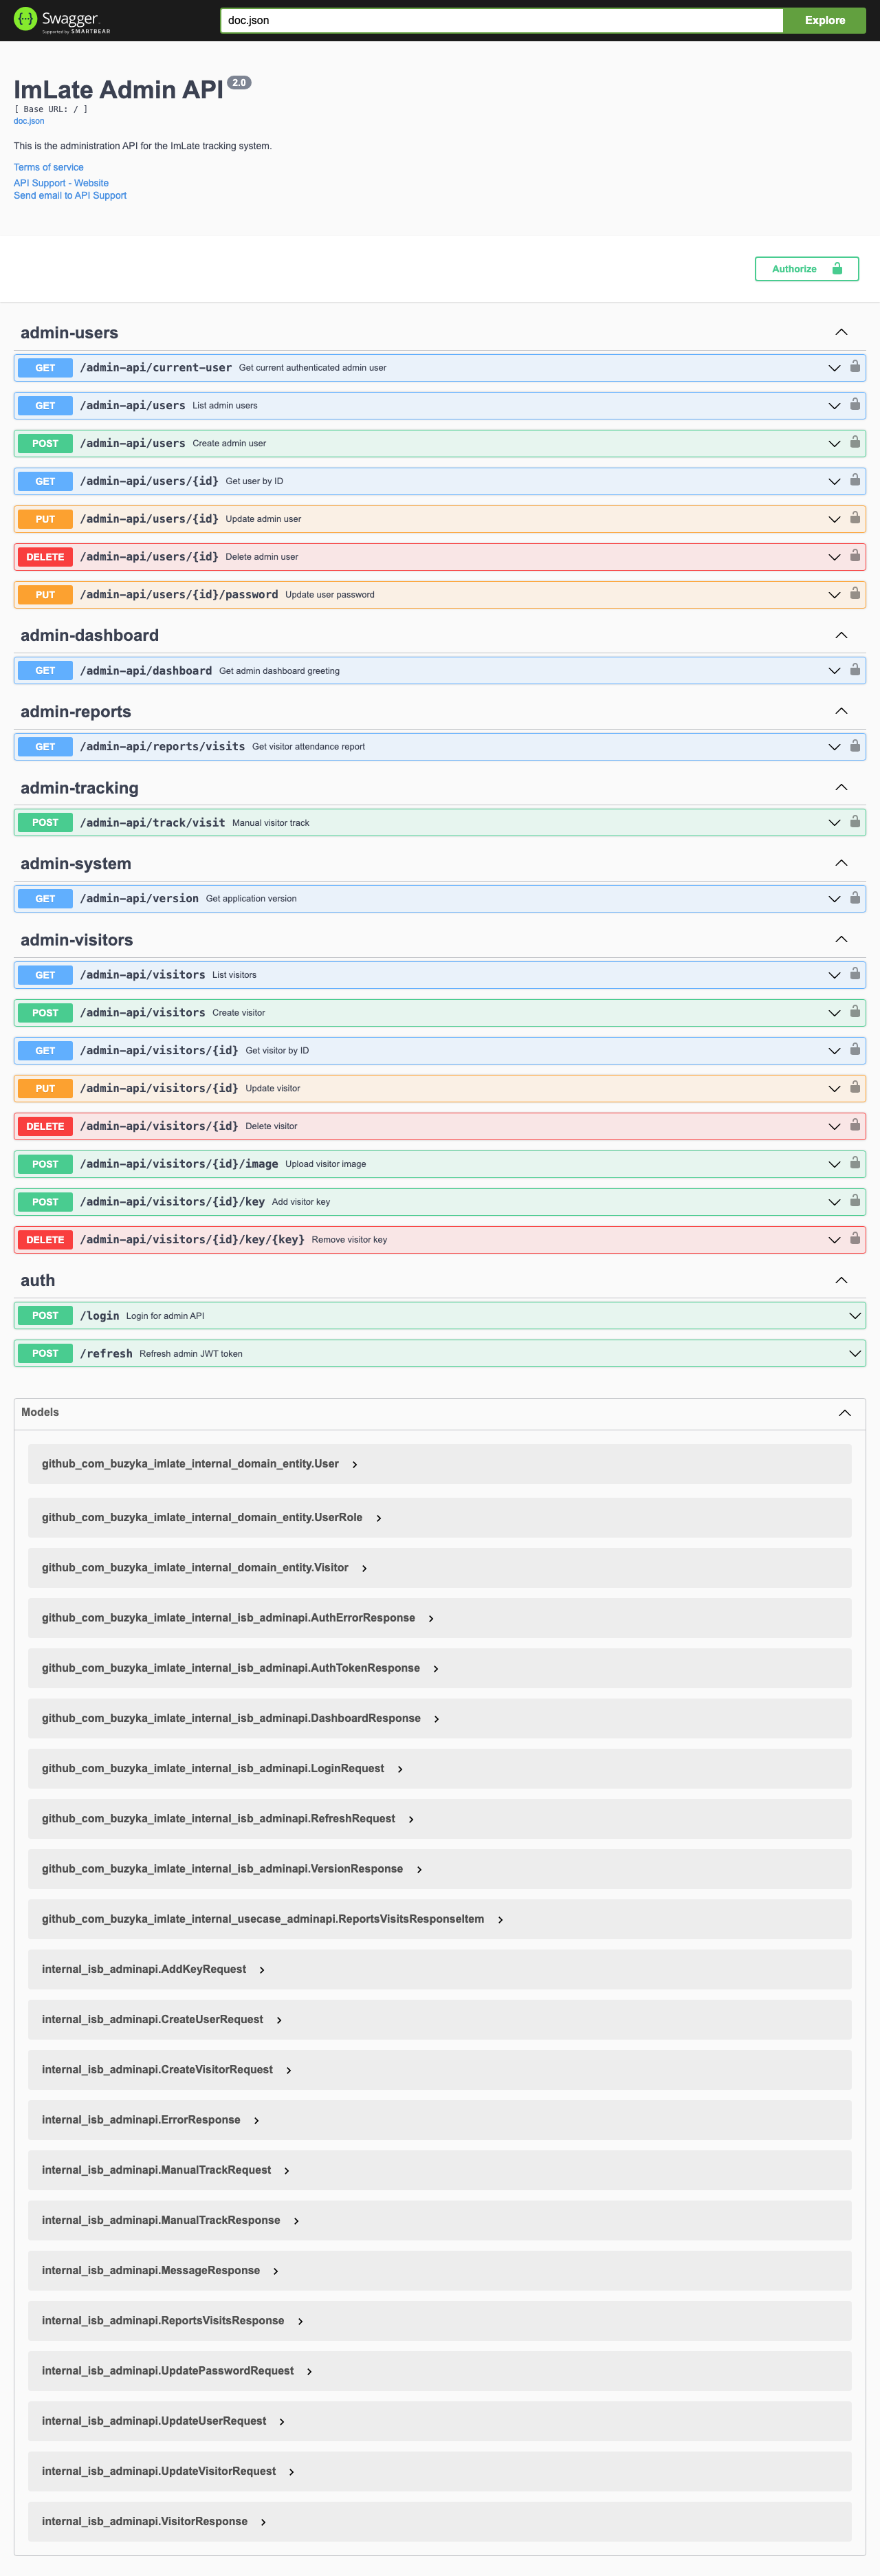
http://localhost:8080/swagger/index.html | Interactive Swagger UI for the API |
http://localhost:8080/admin | Admin Panel (Vue SPA) |
http://localhost:8080/ | RFID Reader terminal UI |
Default Users
The database migration seeds two default users:
| Username | Role | Purpose |
|---|---|---|
admin | admin | Default admin account for the Admin Panel |
terminal | terminal | Default terminal device account |
WARNING
Change the default passwords in production. They are set as bcrypt hashes in the migration and should be replaced with strong credentials.
Useful Commands
| Command | Description |
|---|---|
make start | Start Docker environment (MySQL + app) |
make stop | Stop Docker environment |
make restart | Restart everything |
make restart-app | Restart only the app container |
make logs-app | Tail application logs |
make shell | Open bash in the app container |
make mysql-shell | Open MySQL CLI |
make got | Run all tests |
make gotc | Run tests with coverage |
make gol | Run linter |
make swag | Regenerate Swagger docs |
make migrate-up | Apply pending database migrations |
make migrate-down | Roll back last migration |
make migrate-create name=... | Create a new migration pair |
make dist | Build distributable binary |
Database Migrations
Migrations live in the migrations/ directory and use golang-migrate.
Auto-Migration
The application runs MigrateUp automatically on every startup. If all migrations are already applied, this is a no-op. Deploying a new version with new migrations automatically updates the schema.
Manual Migration
bash
make migrate-up                        # Apply pending migrations
make migrate-down                      # Roll back the last migration
make migrate-create name=add-feature   # Create new up/down migration files
Production Build
Build a distributable binary:
bash
make distThe production Docker image uses a multi-stage build: Go compilation in a builder stage, then a minimal Debian runtime image with only the binary, migrations, and static assets.